Day 194: The World is Changing and So Are We

Another day, another costume! Today I wore one of my fav recent purchases (from an Instagram ad!), love this dress. The scrunchie in my hand is one I made. This weekend at the cottage I’m planning to whip up a few more for friends made from recycled materials. Really looking forward to our weekend in the woods and spending some quality time with my dad. Mask is from my friend Considerate Goods, use code CASIE15% for a discount!

View Post

Day 62: Put It on Ice

It’s the long weekend! I tried ice dye and it turned out so good. It’s a pretty easy technique using dye powder over ice. Chowie Wowie sent a surprise package with a dye kit this week so I went to town. The ice dye process uses powder vs liquid and was pretty easy. I used the remaining powder mixed with water to also do traditional tie-dye. I discovered how to make hearts from a tutorial. Wrapping the garment in plastic for a couple hours helps make the colours brighter. I’ve had this dress in my closet for ages and decided to tie-dye the bottom with bleach. I am so happy with it how it turned out. I might gift this one to a friend bc it’s a little big. It felt nice to put on a summer dress and putter around the cottage. Did a bit of gardening and spent some time reading outside in the sun. We might put the boat in this afternoon!

View Post

Day 36: How to Bleach Dye Your Denim

This little project turned out so good! I’d seen this DIY on Pinterest and Instagram (@primandprimp) so I decided to give it a go. If you want to try, it’s easy, here’s a how-to. You Will Need Jeans Tape Plastic Bag Bleach Spray bottle Gloves Somewhere to bleach with good ventilation ex. outside A couple hours 1: Tape Your Denim Pick a side you want to bleach then tape along the middle seam. Make sure to really get in there so the tape goes right to the edge of the stitching, you don’t want bleach to leak onto the darker side. Once done, grab your plastic bag, roll up the leg that’s not being dyed, and secure the bag. Tape to seal. 2: Spray Get your gloves and workspace ready. If you’re able to go outside, great. I like to use the lid of a storage bin and cover with a garbage bag to avoid making a mess. If you have to do this inside, open a window and turn on a fan. Start spraying your denim and make sure the whole leg is covered. Don’t forget the inseam and sides. If you don’t have a spray bottle, a sponge will work. Use what you can find! 3: Wait Set your project somewhere safe where the colour can develop. I had mine outside on the lawn for about 2 hours then moved inside to the shower for about 45 minutes until the colour stopped changing. It might be a bit drippy at the start, so keep away from anything bleach will ruin. 4: Wash Rince the dyed leg in cold water. You might find he tape is starting to come off because the fabric is wet. This is ok. Throw your new jeans in the washing machine and then the…

View Post

We Made Cement Planters! ?

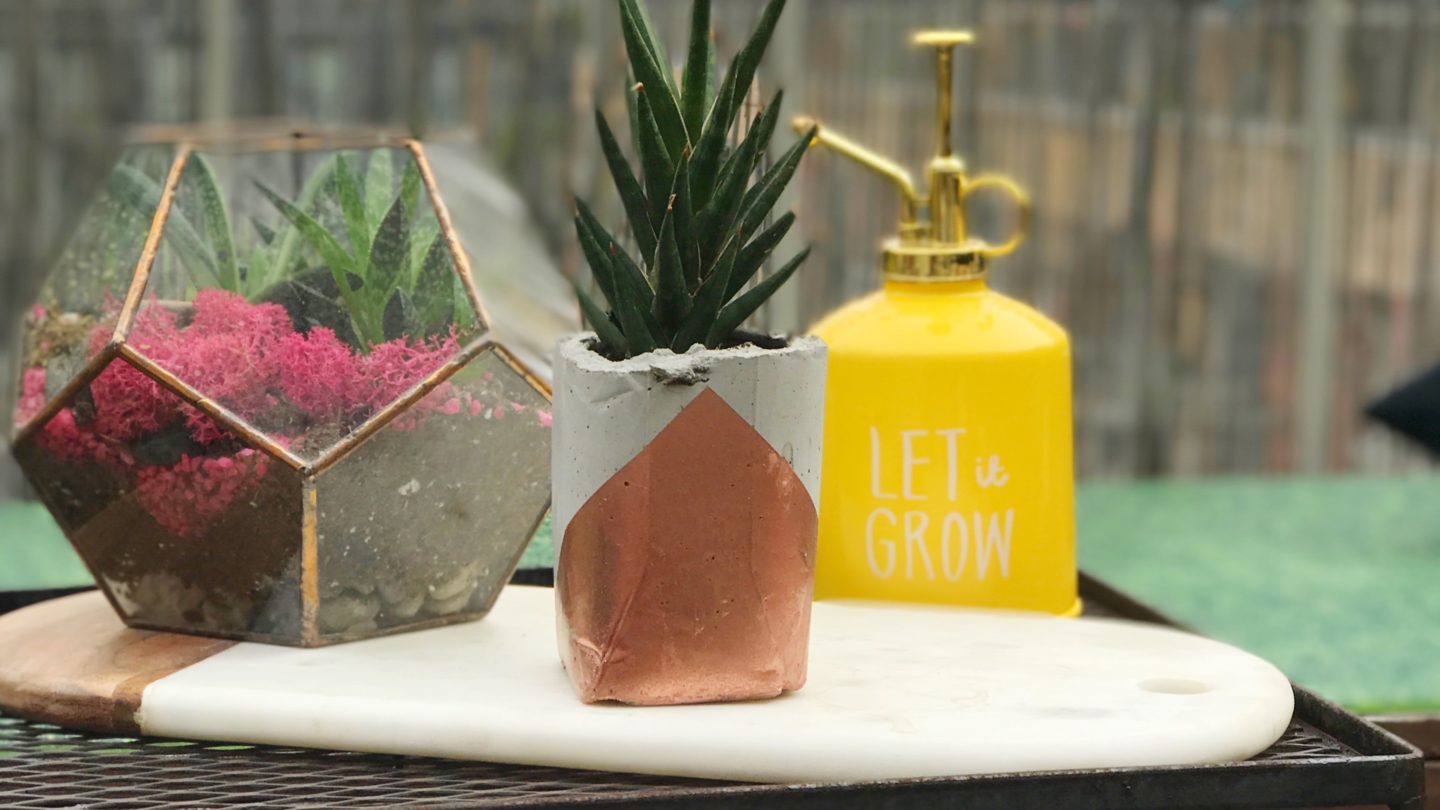
I really wanted to make some of these after seeing they looked pretty easy on Pinterest. AND WELL THEY WERE! Embot and I gave it a go this weekend so she could give one to Grandma for her 70th birthday this week. I followed this video by TO’s own Sorry Girls but I have a few tips to add because they made it look more graceful. ? I used the smallest bag of sand concrete you can get at Canadian Tire. You mix it with water 4/1. We used old juice containers (ie. tetra pack bottoms) and put empty water bottles cut in half with a weight inside to hold the form. The bottle will rise up without a weight. Next time I’ll round up some juice containers before we do it. The concrete can also be messy make sure you put something down on your work space and I high reco doing in the garage our outside. One of the planters was made from a 2L pop bottle and it looks kinda neat because of the bottoms.The concrete takes 24 hours to dry. The water bottles inside the form were kinda hard to get out so we’ll switch to paper cups next (they use Tim’s cups in the video). This was a last minute idea I was kinda just wingin’ it with what we had around the cottage. They still turned out fine! I’ve been dying to get some copper (rose gold!) Krylon paint. I follow/girl crush on Tiffany Pratt and she’s been using it to paint things a lot lately. I put tape on the design I wanted and put on a couple thin coats of Krylon spray paint. Let it dry. Apply a thin layer of wet look concrete sealer to protect the concrete from staining and…

View Post

Made a Thing: Little Wooden Laptop Table

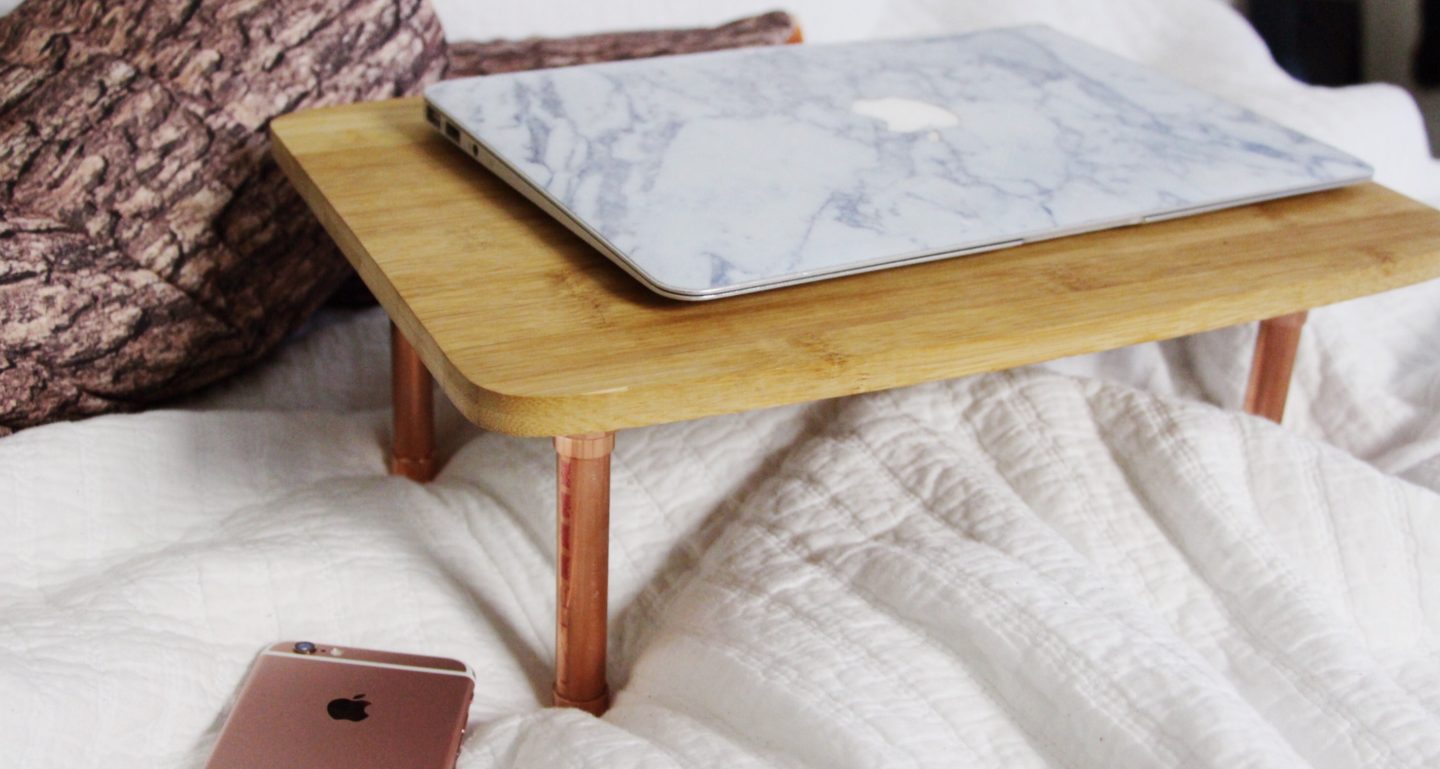
This weekend I did more than just watch Netflix, I made a thing! On Friday night I saw this cool bed table laptop stand thing found it on Etsy. It was $60 but then $40 in shipping and I was like HELL NO. So I decided to make one! Saturday morning I went to Home Depot and picked up 1/2″ copper pipe, 4fittings, and 4 steel flange. I asked a dude who worked there for help to save time and he cut the pipe for me too. I didn’t think about cutting the pipe so this was a huge help! If you’re reading from the UK, you can buy copper from aluminium warehouse or somewhere similar instead. I used a large cutting board we had around the house as the table top. Next time I’ll use a bigger piece of nice wood from the bunch we’ve got at the cottage. I think rougher edges would look nice. All the pieces cost just under $50 and it didn’t take long to put this stuff together. The glue is to hold the pipe bits together and I let it dry overnight. So happy with how this turned out. I saw it, wanted it, and made it! I’m no expert on DIY, yet but I’ve got a long list of things I want to make for the house and cottage. This does however mean that I am going to have to invest in some more tools! Most important of all, I need to find a good cordless drill. The staff over at Coolest Gadgets made a comparison of the top-rated cordless options, so I will definitely be checking out their article for some inspiration. Making things gives me so much joy, I used to spend heaps of time in the garage with my…

View Post

Simple Summer Hosting Hacks for Outdoor Dining

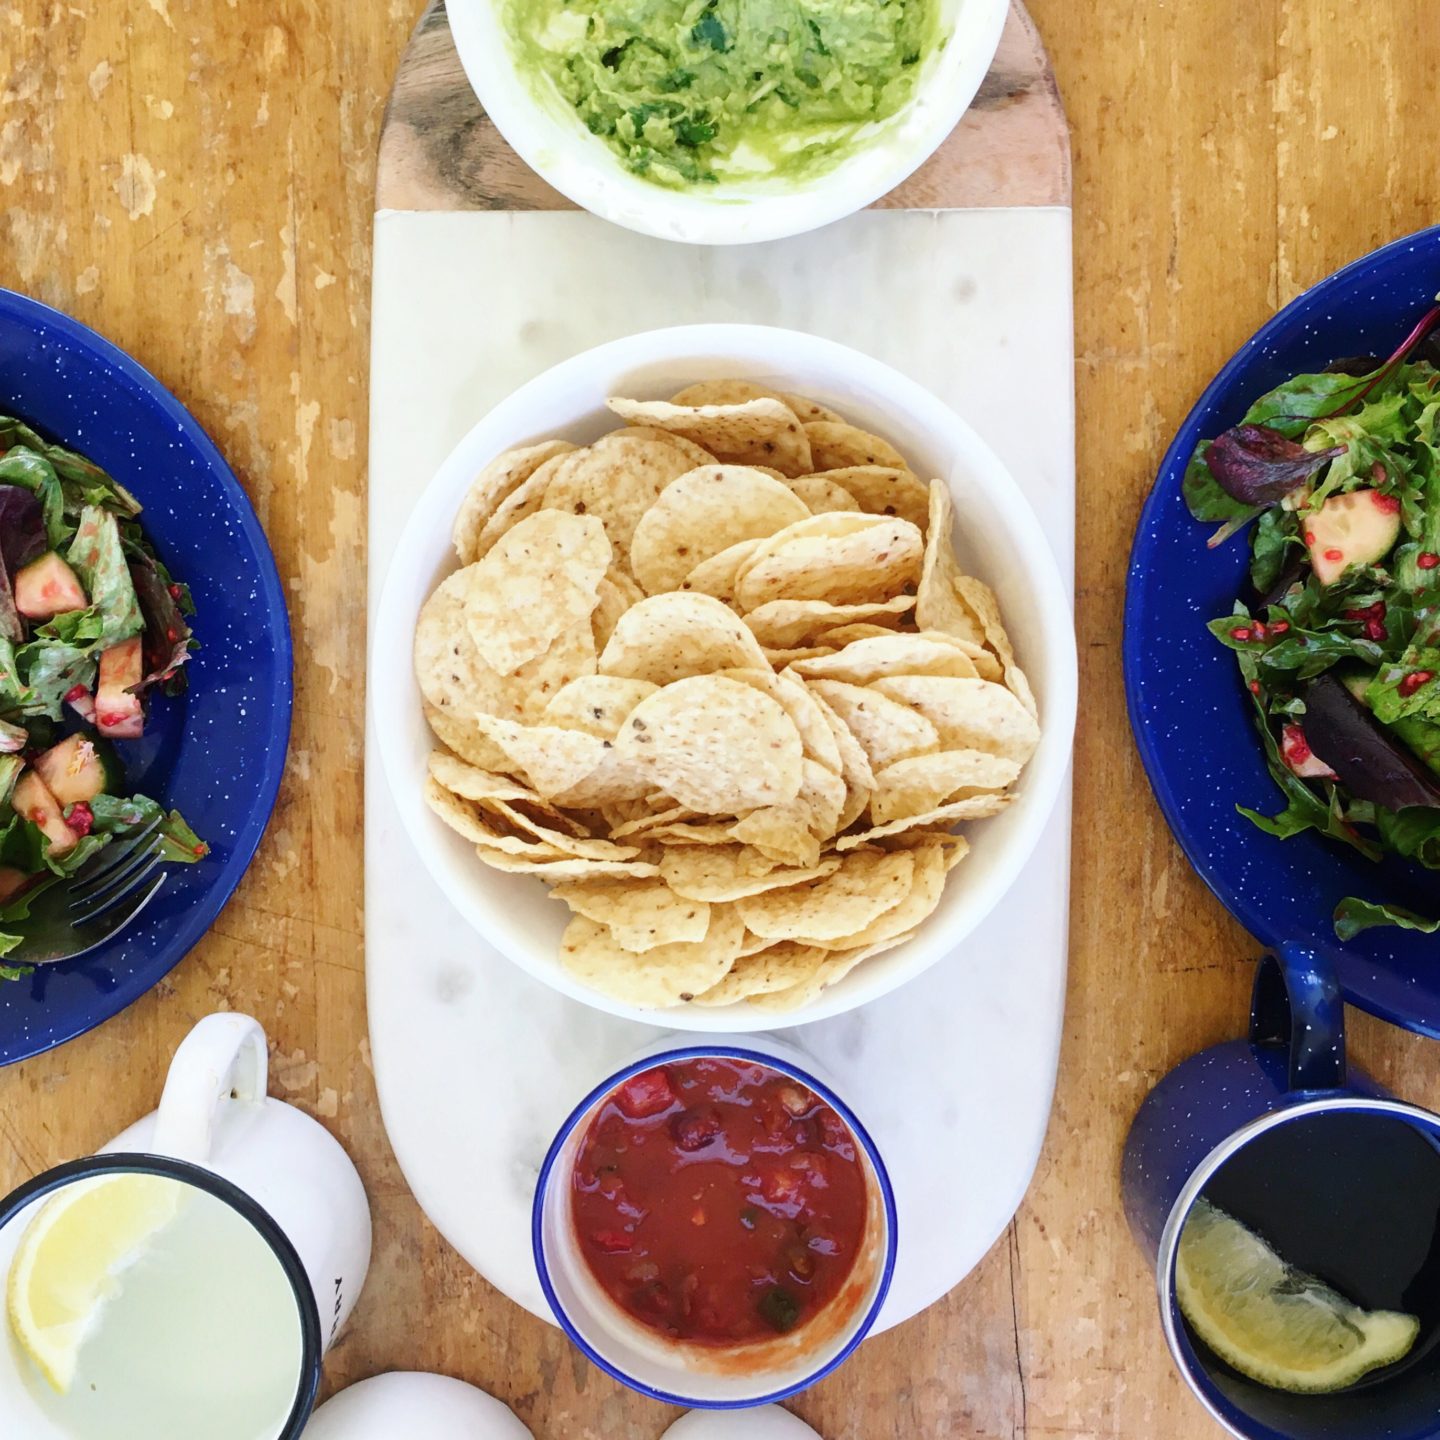
Last weekend at the cottage Emily helped me put together lunch for the fam. It was so fun to do this together, she’s 8 now and a great little helper! She was also quite stoked to help with the blog. ? Scroll down for a few ‘hacks’ we can up with using stuff you just might find around the house, the kitchen, or the garage.  It was all pretty simple and not too expensive, BUT when we put it together, it looked great! I guess that’s why they’re called HACKS. On the Menu We made mini sushi-style BLT wraps, a hot dog bar,  and mini bacon grilled cheese using products from Butterball Canada we picked up at Loblaws. Simple Summer Hosting Hacks for Outdoor Dining   Make an outdoor table using an old door.  Use wrapping paper to decorate the table. Makes for easy cleanup!  Organize your napkins or cutlery with Washi Tape. There are HEAPS of colours/prints! Freeze lemons to use in cocktails. ??? No need to water down those drinks with ice!  Use a muffin baking tray for condiments.   Raid the dollar store for plastic plates and stack them. These same items were more $$$ at houseware stores.  Baking cups inside little mason jars for sauces. Heaps of colours in these making mason jars even cuter.  Put skewers in watermelon for easy snacking. I put them in the freezer so they were MAD CHILL. ☃️ If you loved this post LMK! Was fun putting it together. It was my first time trying turkey bacon which is 50% less fat than using bacon from pork. Found that it cooked a bit faster and made our meal a *little* healthier. The following day we used some leftovers to make cracked pepper maple bacon  that I’ll share in another post soon!   * post sponsored by Butterball Canada but Emily and I totally did this all ourselves!

View Post

DIY | Make It Marble in 3 Easy Steps

Last week I picked up a gorgeous marble cheese board form The Drake Hotel. It’s real marble and very heavy. Perfect for dinner parties and taking Instagram photos. However, my BF decided it was a great cutting board and now there’s a couple lines in it from a knife. I started thinking about how I could make another cutting board with marble accents after seeing some marble formica for countertops online. I picked up a bamboo cutting board ($3), a plastic cutting board ($2), and a roll of faux marble for lining cupboards.  I did’t even know they had that stuff!   This was to test if it even looks good, if so, will get some of the fancier stuff from a home hardware type shop. It seriously took about 5 whole minutes to do this and now I’ve got a marble mousepad at work that is a great backdrop for photographing things at my desk. Make Something Marble Get marble wrap and something to put it on Put it on the thing Take a photo & show your awesomeness SEE HOW EASY THAT WAS OMG. YOU ARE A DIY WIZARD. Remember the awesome marble  laptop case I had ages ago? (It’s not avail anymore, sorry) I thought I would combine that concept and some supplies form my local dollar store. Well, it totally worked!   I recently got a permanent desk after working with 1188 for the last year and I wanted to make it nice. It’s so glam now! Look how great my coffee looks with vintage glasses on this wood/marble. OH SO FANCY. I know you probably don’t think of me a DIY’er but I actually make heaps of things. I’ll share more of them this year! If you give this a try over the weekend, I’d LOVE to know what you make. TWEET ME HERE. The…

View Post